This is not a project for the impatient. I am impatient. I am certifiably the worst case of must-get-instant-gratification ever. Even worse than my toddler. That being said... Lets move right along.
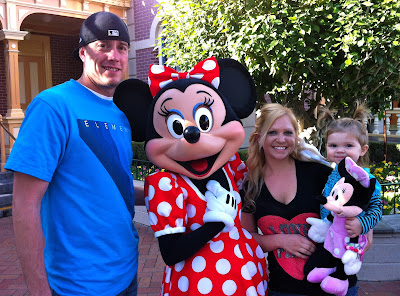
This year's birthday theme is Minnie Mouse. It seems like a perfect 2-year-old theme, one my kid in particular is very fond of. We did traditional cake and ice cream last year for
her 1st birthday party, so
this year I wanted to switch it up and make something on-the-go since we're having it at a park.
I started this batch of cake pops the same as I do every other, by baking a Duncan Hines cake, right out of the box, following their directions. I chose Red Velvet only because it's my personal favorite. It works just as great with yellow, white or chocolate.
After it cools down, I break the entire cake up into a bowl and mix it with a 1/2 tub of cream cheese frosting. Yes, it has to be cream cheese frosting.
It looks like this big bowl of mess by the time you're done with it. Gooey and delicious.
Next up you are going to turn that gooey and delicious mess into a small army of round balls about the size of a Ping Pong ball. One cake and one tub of cream cheese frosting usually makes about 40 balls. Put them in the refrigerator to chill over night if you can, or at least a couple of hours. It makes them much easier to work with later. Trust me. No need to freeze them.
In the meanwhile, take a bag of circle candy melts and cut them into a 3/4 moon type shape for the ears. I used a measuring spoon and just cut out the bottom of the wafers. Minnie's coloring works best when you use the black candy melts, but as I found out at my local Michael's store, they are only sold during Halloween season. Same as black food coloring. So I just used dark chocolate instead.
When your chilled balls are ready, melt some of the left over chocolates and use it to "glue" the ears right on top. Put them back in the fridge for an hour or so to let them set.
While the ears are setting, you need to make your base for these little guys to stand. I normally use styrofoam but my go-to store was out today so instead I used green floral wet foam. Either one works fine. Just get one with enough width to hold a lollipop stick. Wrap that puppy up in the tissue paper color of your choice and you've made yourself a stand.
Next you want to just very gently poke a 4 inch lollipop stick right in the bottom of your Minnie head. I like to dip the very tip of my sticks again into a touch of melted chocolate "glue" just to really set them. You don't want them to fall off when you're trying to coat them. Once you have stood them up in their tissue covered stand, put them back in the fridge for another hour or 2 before you do the coating.
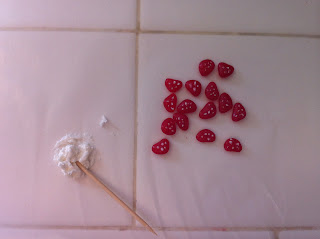
While your cake pops are staying cool, you'll want to make Minnie's bow. Either heart shaped sprinkles or heart shaped candy such as Red Hots work the best. If you want to get super fancy you can even dip a toothpick in some white icing and make a couple of polka dots.
So this next step is a quick one. You want to dip these suckers into a melted pot of all your left over candy melts. Do only a handful at a time and keep the others refrigerated. They lose their chillness really fast and the warmer they are the more likely these Minnie's tend to slide off their stick and jump to their death. You've worked too hard here for suicide attempts so just keep them chilled, work quick and bypass the problem.
Also, when I first started making cake pops, my coating chocolate was way too thick. Adding a little bit of vegetable oil until you get the thinner consistency that you want works wonders and doesn't alter the taste. (Even a splash or two of milk can thin it down a little bit but be careful with that because you don't want your chocolate to be so thin that it doesn't stick at all)
While your chocolate is fresh on your cake pop and hasn't yet dried, carefully place two of your candy hearts back to back in between the ears to make Minnie's bow.


