Thursday, July 11, 2013

Dutch Oven Peach Cobbler

I've been experimenting with our new dutch oven pretty much nonstop since getting it. I had a friend at work give me this great recipe for dutch oven peach cobbler and tried it out last night to see what was up. Turns out, it was total perfection. Absolutely delicious and super easy.

5 ingredient dutch oven peach cobbler for camping www.thebrighterwriter.blogspot.com

Ingredients:
* 2 cans (21oz each) peach pie filling
* 1 stick butter
*1 box yellow cake mix
* Ground cinnamon

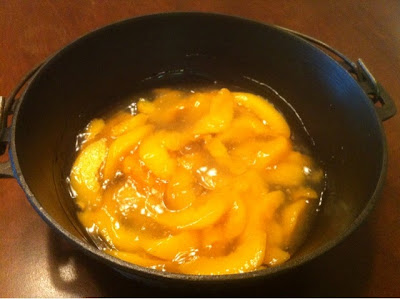
First, empty the 2 cans of pie filling and evenly spread on the bottom of your dutch oven.

5 ingredient dutch oven peach cobbler for camping www.thebrighterwriter.blogspot.com
Next, empty the entire box of dry cake mix on top and spread evenly.

5 ingredient dutch oven peach cobbler for camping www.thebrighterwriter.blogspot.com

Finally, slice butter in small pieces and distribute evenly over top of dry cake mix then top with cinnamon.

5 ingredient dutch oven peach cobbler for camping www.thebrighterwriter.blogspot.com

With 15(ish) coals on bottom and 10(ish) coals on top, cook for 45-60 minutes. Check every few minutes after 40, you don't want it to burn.

5 ingredient dutch oven peach cobbler for camping www.thebrighterwriter.blogspot.com


5 ingredient dutch oven peach cobbler for camping www.thebrighterwriter.blogspot.com

If you have a freezer in your camper, it goes insanely well with snickerdoodle ice cream!
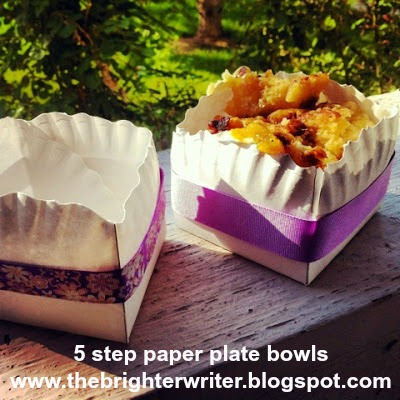
If you don't have a freezer handy, these little paper plate bowls are really easy to make!

easy tutorial: 5 step paper plate bowls for picnics or camping www.thebrighterwriter.blogspot.com

Supplies:
*white paper plate
*scissors
*craft paper edge scissors
*ruler
*pretty tape, rubber bands or sticky ribbon
*4 paper clips

easy 5 step paper plate bowls for picnics or camping www.thebrighterwriter.blogspot.com

Cut about 1/4 inch (o whatever height you'd like it) off the top of your circumference on your paper plate using your craft edging scissors.

easy 5 step paper plate bowls for picnics or camping www.thebrighterwriter.blogspot.com

Flip your paper over so the front side is facing down and use your pencil and ruler to mark a 9 section grid. You can measure if you're a perfectionist like me.

easy 5 step paper plate bowls for picnics or camping www.thebrighterwriter.blogspot.com

Use your straight scissors to cut a slit along every other line but don't cut the center square.

easy 5 step paper plate baskets for camping or picnics www.thebrighterwriter.blogspot.com

Fold up one side at a time to form your basket using a paper clip to hold the sides together as you go.

easy 5 step paper plate bowls for picnics or camping www.thebrighterwriter.blogspot.com

Wrap your rubber bands, tape or sticky ribbon around your basket to hold in place and you're finished!
You can line these with wax paper if you have a food that might leak through. Enjoy!
easy 5 step paper plate bowls for picnics or camping www.thebrighterwriter.blogspot.com

No comments:

Post a Comment